Recent Posts
- How to Tint Lashes Like a Pro: 5 Steps Every Lash Lift Technician Should Master
- Brow Tinting Struggles: Pro Tips to Solve Your Most Common Challenges
- Is it Better to Tint the Lashes During the Lift or After the Lift is Complete?
- Should I Cleanse the Lashes Before a Lash Lift?
- How to Choose the Correct Silicone Rod or Shield Size for Each Client’s Lashes
How to Tint Lashes Like a Pro: 5 Steps Every Lash Lift Technician Should Master
Posted by Gina on Feb 23, 2026
How to Tint Lashes Like a Pro: 5 Steps Every Lash Lift Technician Should Master
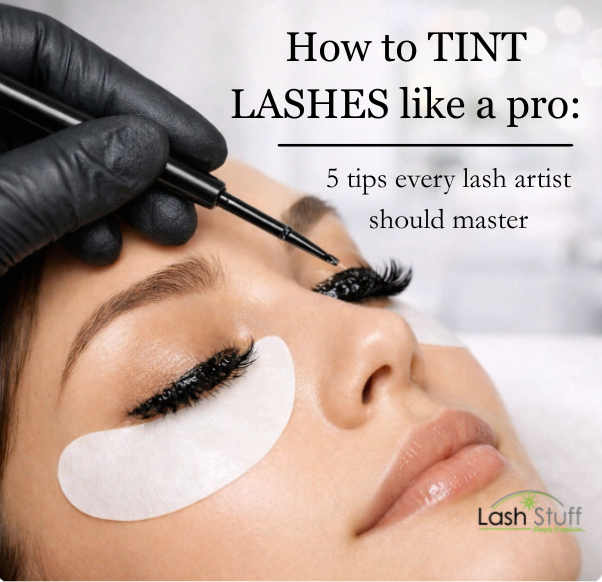
Learning how to tint lashes properly separates amateur work from professional results. Whether you're just starting your journey as a lash lift technician or looking to refine your skills, mastering these five essential steps will help you deliver bold, beautiful lashes every single time.
Lash tinting isn't complicated. But it does require precision, the right products, and a systematic approach. Get these steps down, and you'll build a reputation for stunning results that keep clients coming back.
Let's break down exactly what you need to know.
Step 1: Conduct a Patch Test and Prepare the Eye Area
Safety comes first. Always perform a patch test 24 to 48 hours before the appointment.
Mix a small amount of tint with developer and apply it behind the client's ear or on their inner forearm. Wait two minutes, then remove it. This simple test catches potential allergic reactions before they become a problem.
When your client arrives for their appointment, start with a thorough cleanse. Remove all makeup, oils, and residue from the eye area. Clean lashes take tint better and reduce the risk of irritation.
Next, utlize your eyelash shields or eyelash tint guard. Place them directly under the lower lashes, as close to the lash line as possible without touching the eye itself.
This protective barrier prevents tint from staining the delicate under-eye skin. It also catches any product that might drip during application.
Take your time with this step. Proper preparation prevents most tinting mishaps before they happen.
Pro tip: If you're looking to expand your skills, we offer free lash certification online that covers lash tinting, lash lifts, and you will receive for free with the purchase of the Professional Lash and Brow Tint Kit.
Step 2: Mix the Tint to the Correct Consistency
Grab a plastic mixing cup or glass dapping dish. Never use metal containers, as they can react with the developer and affect your results.
Lash Stuffs eyelash tint require a 1:1 ratio of tint to developer.
Squeeze equal amounts of tint and developer into your mixing cup. Use a clean mixing stick to blend them thoroughly until you achieve a smooth, creamy consistency. The mixture should look like a thick paste: not too runny, not too thick.
Why we love Kalentin tint: Our Kalentin tint is completely free of PPD and Resorcinol, two harsh chemicals that cause most allergic reactions. You get professional, long-lasting color without compromising client safety.
Step 3: Apply Tint to Lower Lashes First
Load your applicator brush with a generous amount of tint mixture. You want enough product to coat each lash completely without dripping.
Start with the lower lashes on one eye. Apply the tint from the base to the tip of each lash, working methodically across the entire lower lash line. Don't skip the corner lashes: they need color too.
Move to the other eye and repeat the process. Always complete both eyes' lower lashes before moving on.
This sequence matters. Starting with lower lashes while the client's eyes are still open gives you better visibility and control. It also prevents tint from dripping into the eye if they need to open their eyes for any reason.
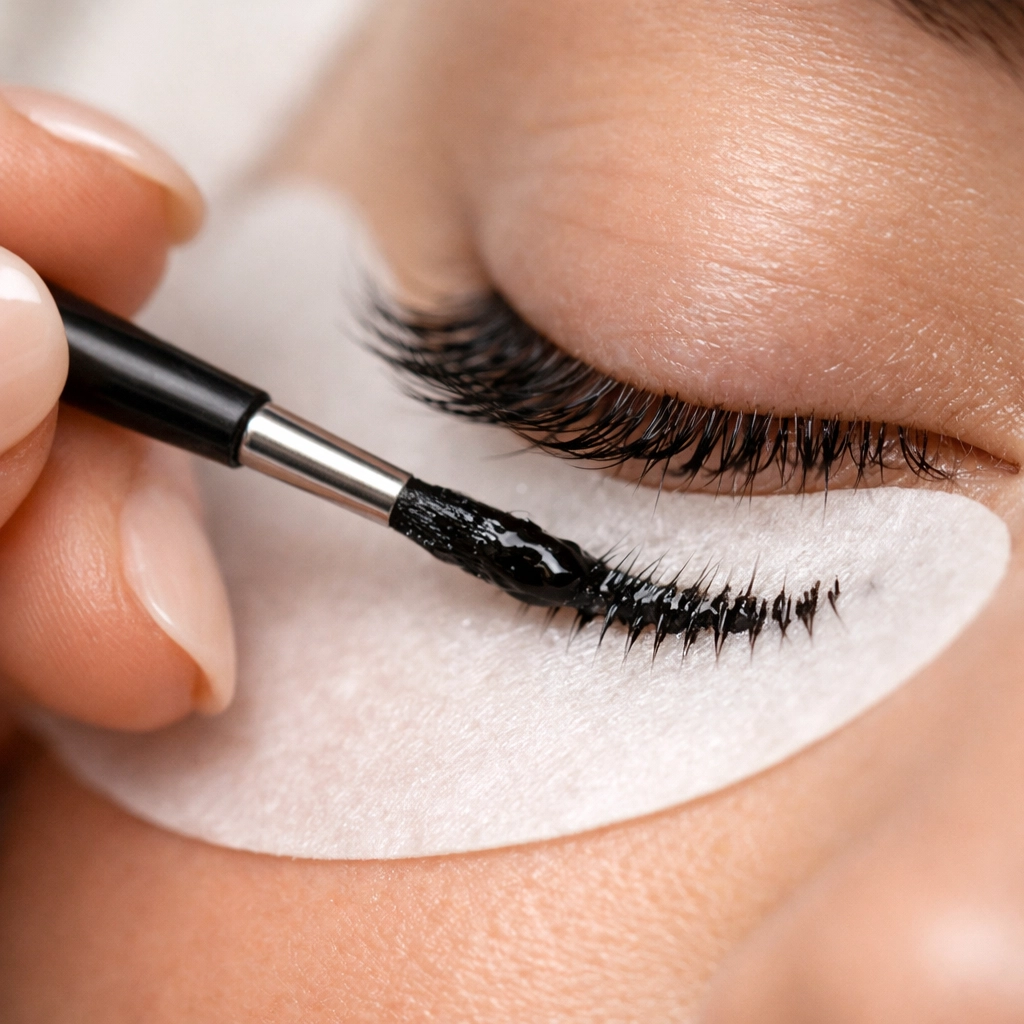
Keep your application neat and precise. Wipe excess product from your brush before each stroke to maintain control.
Step 4: Apply Tint to Upper Lashes
With your client's eyes closed, load fresh tint onto your applicator brush.
Apply the mixture to the upper lashes of one eye, starting at the base and working toward the tips. Make sure every single lash gets coated, including those hard-to-reach inner and outer corner lashes.
Use a systematic approach: work from one side of the lash line to the other in a consistent pattern. This prevents you from missing sections or applying uneven coverage.
Repeat the process on the other eye. Take your time and be thorough. Rushed application leads to patchy results.
The goal is complete, even coverage across all lashes. You should see a thick, uniform layer of tint on every lash from root to tip.
If you notice any spots you missed, add more product immediately. It's much easier to add tint now than to try correcting uneven color after processing.
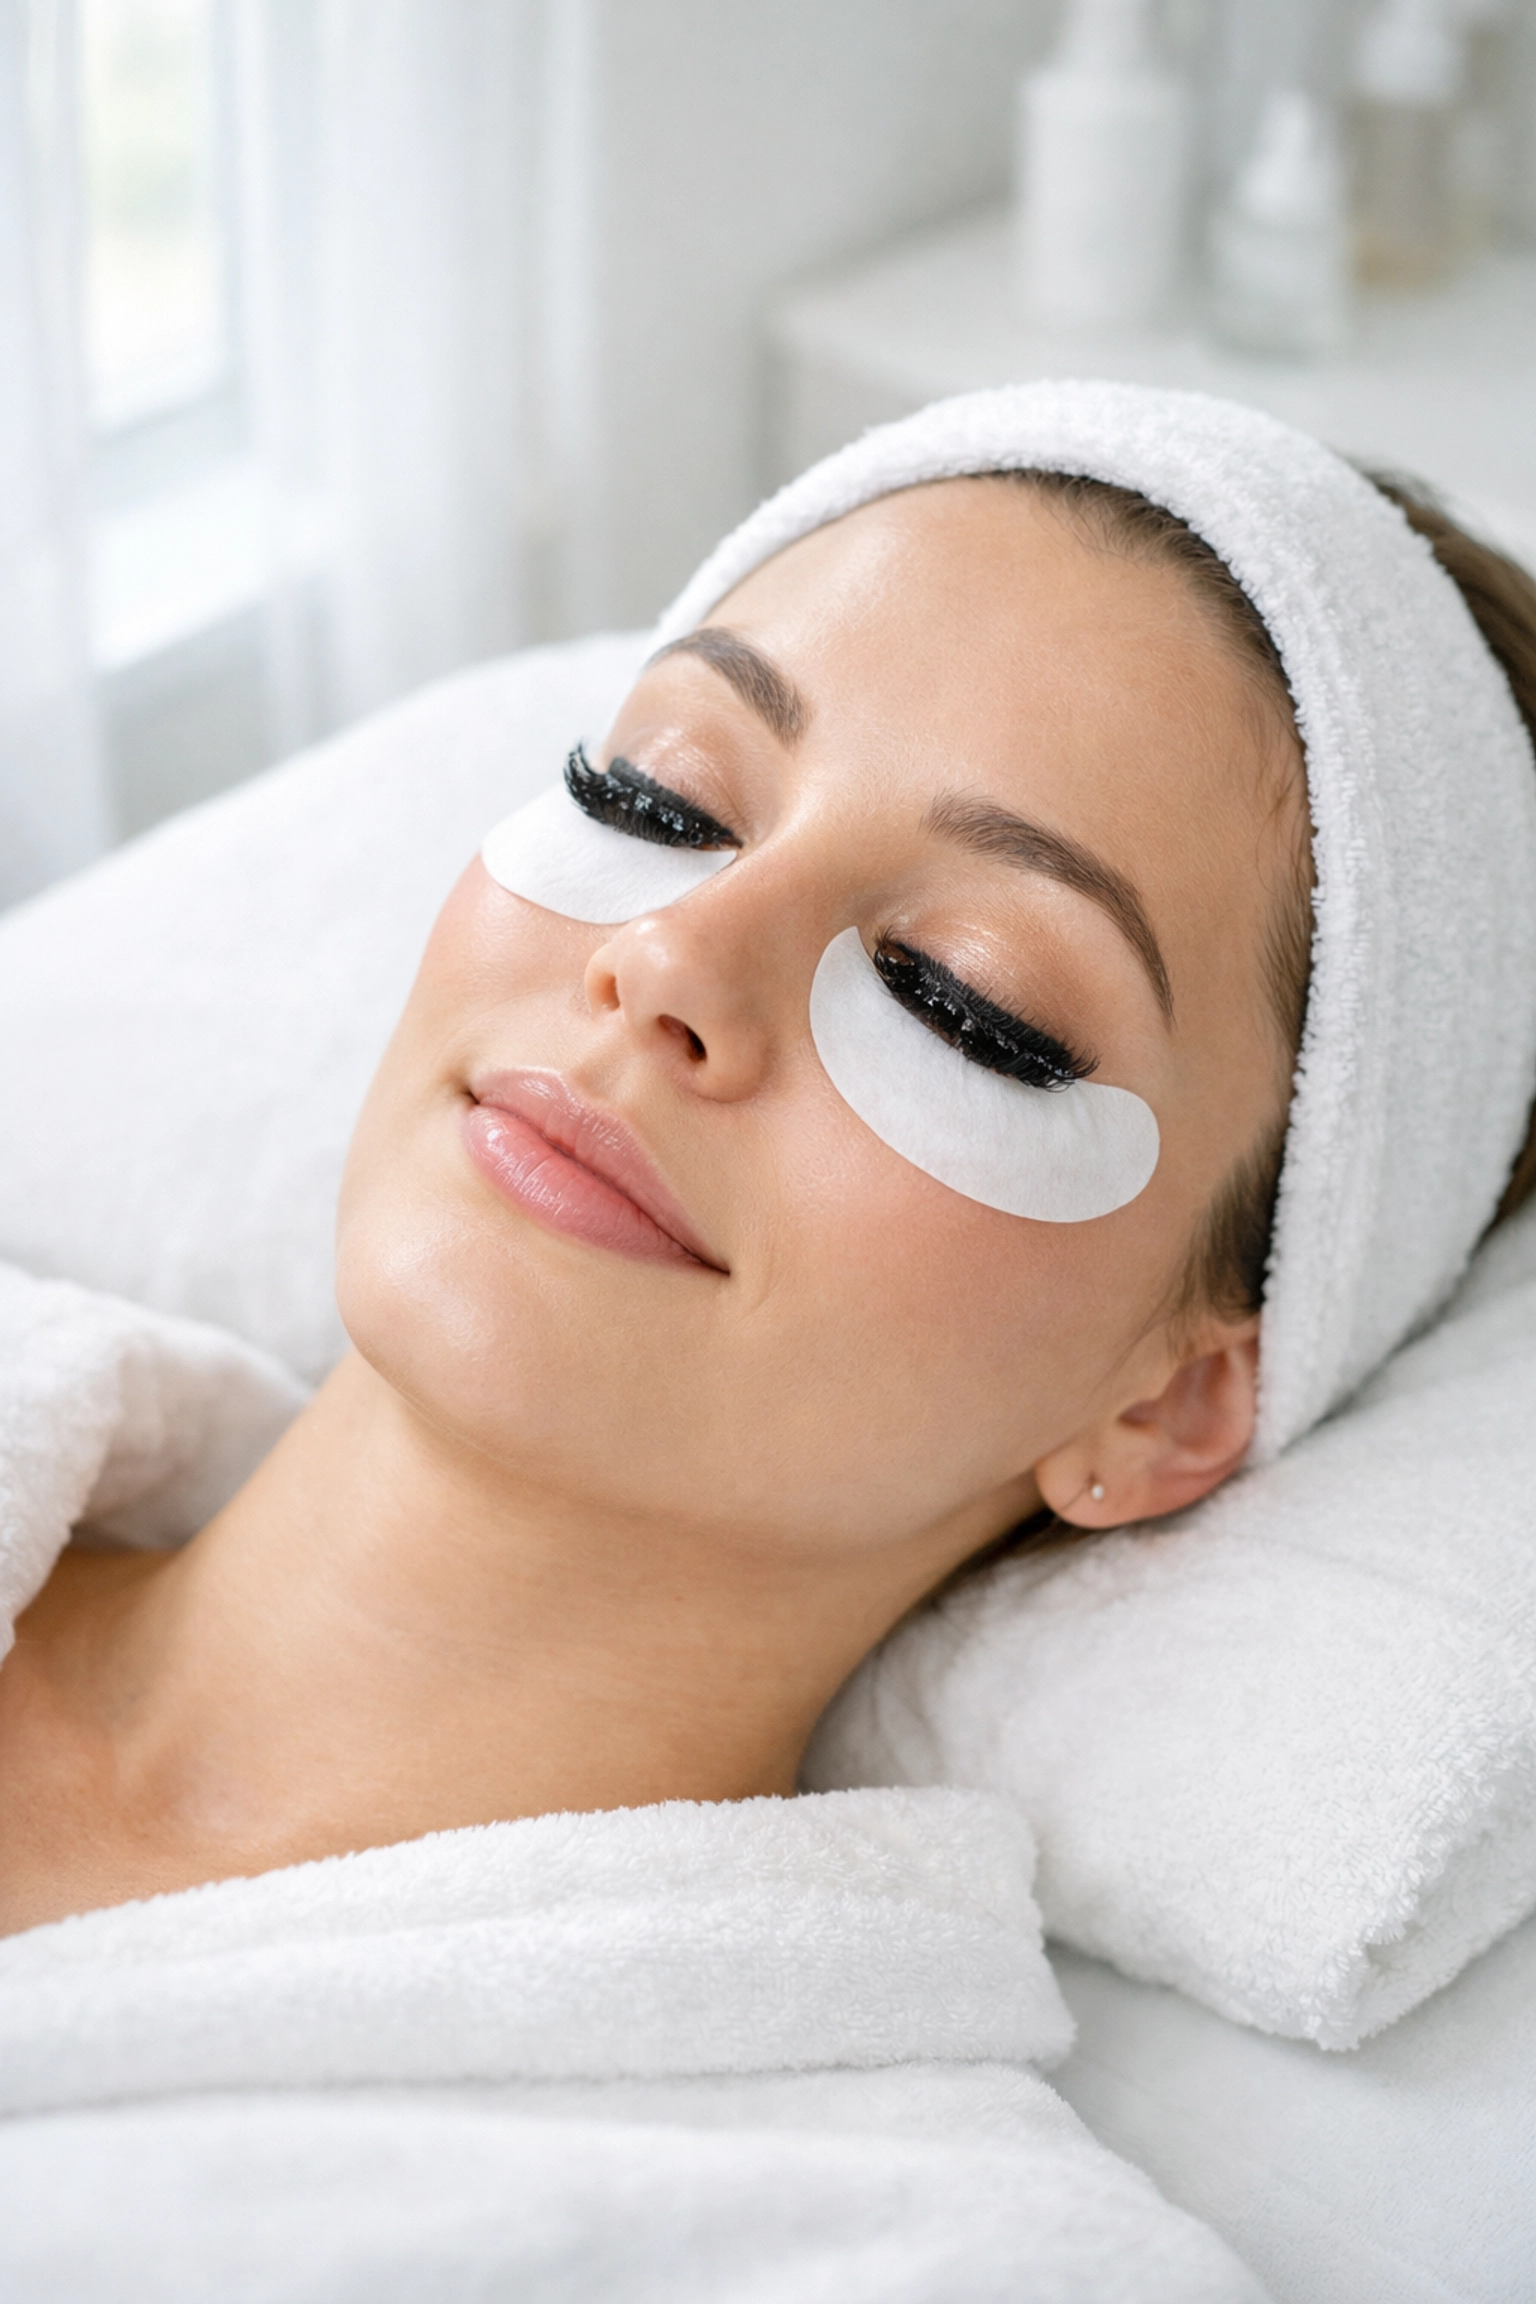
Step 5: Process, Remove, and Provide Aftercare
Start your timer as soon as you finish applying tint to the second eye. Standard processing time is 6 to 10 minutes.
Set a timer on your phone or use a dedicated service timer. Don't guess: accurate timing ensures consistent results.
During this processing time, your client should remain still with their eyes closed. You can use this time to explain aftercare or simply let them relax.
When the timer goes off, check the color intensity. If the lashes aren't as dark as you want, you can reapply tint and process for another 6 to 10 minutes. Most lashes reach full saturation in the initial 6 to 10-minute window, but finer or lighter lashes sometimes need extra time.
Once processing is complete, remove the under-eye protection pads carefully. Dampen lint-free cotton pads with lukewarm water. Gently wipe downward on the lashes, removing all tint product. Keep wiping with fresh dampened pads until you see no residue.
Never rub or scrub. Use gentle downward strokes that follow the natural direction of lash growth.
After removing all visible tint, apply a small amount of lash conditioner for lash lift or conditioning oil to the lashes. This nourishes the lashes and removes any remaining microscopic tint particles.
Your client can now open their eyes to reveal perfectly tinted lashes.
Aftercare Instructions That Keep Lashes Looking Great
Educate your clients on proper aftercare. Tell them to avoid water, steam, and oil-based products on their lashes for the first 24 hours. This allows the tint to fully set and maximizes color longevity.
After the first day, they can return to normal cleansing routines. Encourage them to use a lash conditioner for lash lift or a gentle lash serum to maintain lash health.
Well-cared-for tinted lashes can maintain their color for 4 to 6 weeks. Results vary based on the client's natural lash growth cycle and how well they follow aftercare instructions.
Send clients home with a small aftercare card that lists dos and don'ts. This simple touch shows professionalism and helps ensure they get the best possible results from your service.
Check out our aftercare products designed specifically for lash lift and tint services.
Building Your Lash Tinting Skills
Mastering how to tint lashes takes practice. Your first few clients might take longer than expected, and that's completely normal.
The more you practice these five steps, the more efficient and confident you'll become. Soon you'll be able to complete a full lash tint service in under 30 minutes while maintaining impeccable quality.
Consider practicing on mannequin heads or willing friends before you start charging clients. This builds muscle memory and helps you develop a smooth, professional technique.
If you're serious about becoming a skilled lash tint technician, invest in quality eyelash tint kits from the start. Professional-grade products deliver better results and make your job easier.
We're proud to offer premium tinting supplies that professionals trust. Our Kalentin tint formula provides rich, lasting color without harsh chemicals. It's the kind of product that makes your work shine and keeps clients safe.
Ready to level up your lash game? Browse our complete collection of professional supplies at Lash Stuff. You'll find everything you need to deliver exceptional lash tint and lift services.