Recent Posts
- The Ultimate Guide to How to Tint Lashes: Why Lash Conditioner for Lash Lift is Your Secret to Happy Clients
- 7 Mistakes You’re Making with Lash Lifts (and How Lash Lift Balm Saves the Day)
- How to Tint Lashes Like a Pro: 5 Steps Every Lash Technician Should Master
- Brow Tinting Struggles: Pro Tips to Solve Your Most Common Challenges
- Is it Better to Tint the Lashes During the Lift or After the Lift is Complete?
The Ultimate Guide to How to Tint Lashes: Why Lash Conditioner for Lash Lift is Your Secret to Happy Clients
Posted by Gina on Mar 03, 2026
The Ultimate Guide to How to Tint Lashes: Why Lash Conditioner for Lash Lift is Your Secret to Happy Clients

Lash tinting is one of the most popular services in the beauty industry. It is a quick, effective way to give clients the look of wearing mascara without the daily effort. However, being a great technician means more than just applying color. You need to understand the science behind the products and the importance of post-treatment care.
In this guide, we break down exactly how to tint lashes like a pro. We will also explore why using a high-quality lash conditioner for lash lift services is the absolute key to keeping your clients' natural lashes healthy and their results long-lasting.
Why Professional Eyelash Tint Kits Matter
The quality of your work is only as good as the products in your kit. Using subpar tints can lead to irritation, poor color payoff, and unhappy clients. When you invest in professional eyebrow tint and lash kits, you are investing in your reputation.
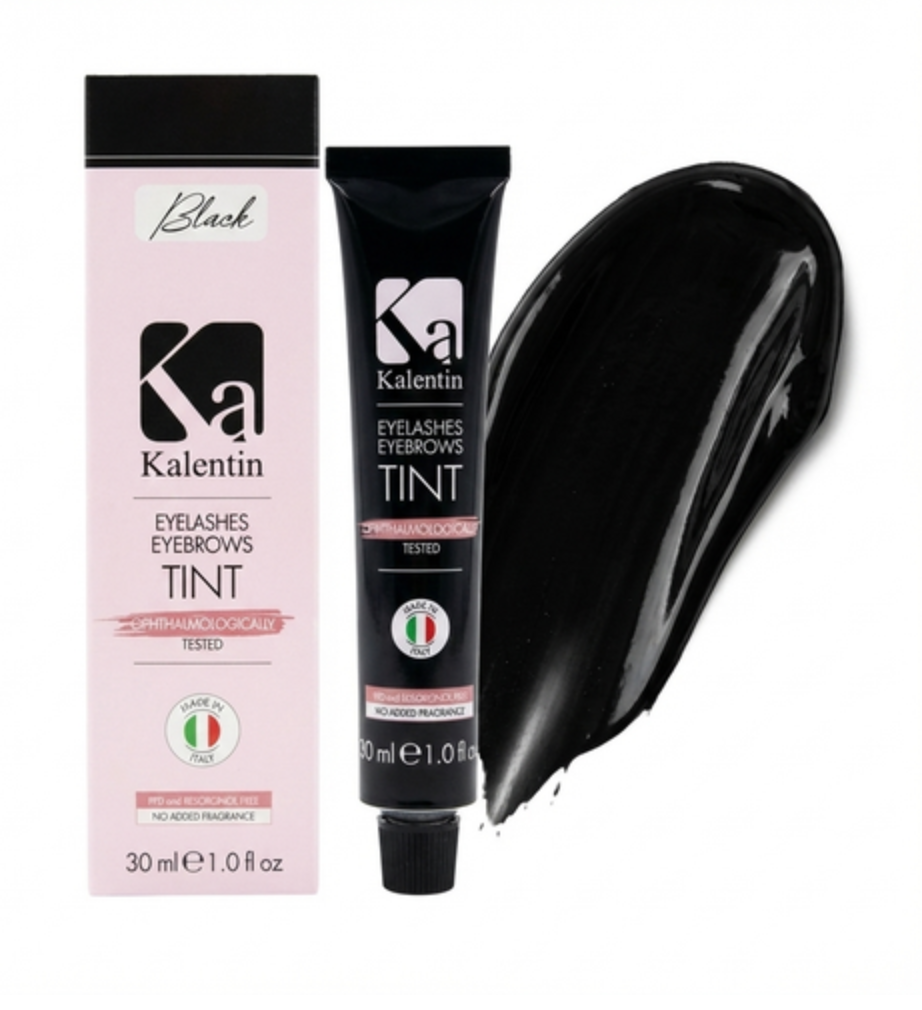
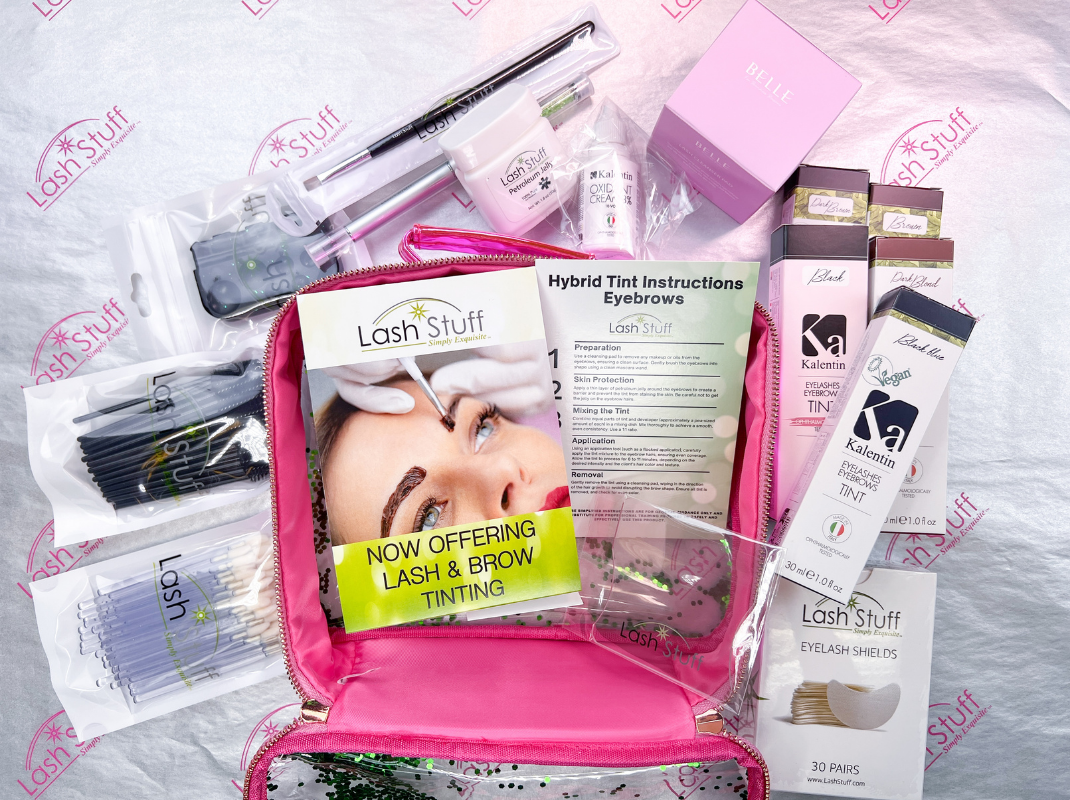
At Lash Stuff, we recommend the Kalentin line. It is a game-changer for professionals. These tints are PPD and Resorcinol free. This means they are gentler on the eyes and skin while still providing intense, rich color. When you offer a safer alternative, you build trust with your clients.
Preparing the Client for Success
Success begins before the tint ever touches the lashes. Proper preparation ensures the tint adheres correctly and stays vibrant for weeks.
- Remove all makeup. Use an oil-free cleanser or a dedicated makeup remover foam. Any residue will act as a barrier to the tint.
- Remove contact lenses. Clients should remove lenses to prevent irritation from any stray product.
- Dry the lashes completely. Tint does not take well to wet hair. Ensure the area is bone-dry before you start.
- Apply a barrier cream. Use petroleum jelly or a specialized eye cream around the lash line. This prevents the skin from staining.
- Place protection pads. Use silicone eye pads or waxed papers under the lower lashes. This keeps the lower eye area clean and comfortable for the client.
Mixing Your Tint Like a Pro
The consistency of your mixture determines how easy it is to apply. You want a smooth, creamy paste that stays exactly where you put it.
Most professional kits require a 1 to 1 ratio of tint to developer. Use a glass mixing dish and a plastic spatula. Avoid metal tools, as they can react with the chemicals in the tint. Mix until the color is uniform and the texture is thick enough to cling to the brush without dripping.
Common eyelash shades include:
- Black: For that classic mascara look.
- Blue-Black: Adds a multidimensional shine that looks incredibly dark and glossy.
- Dark Brown: Perfect for fair-haired clients who want a subtle enhancement.
How to Tint Lashes: The Step-by-Step Process
Following a consistent system ensures you never miss a lash and always get symmetrical results.
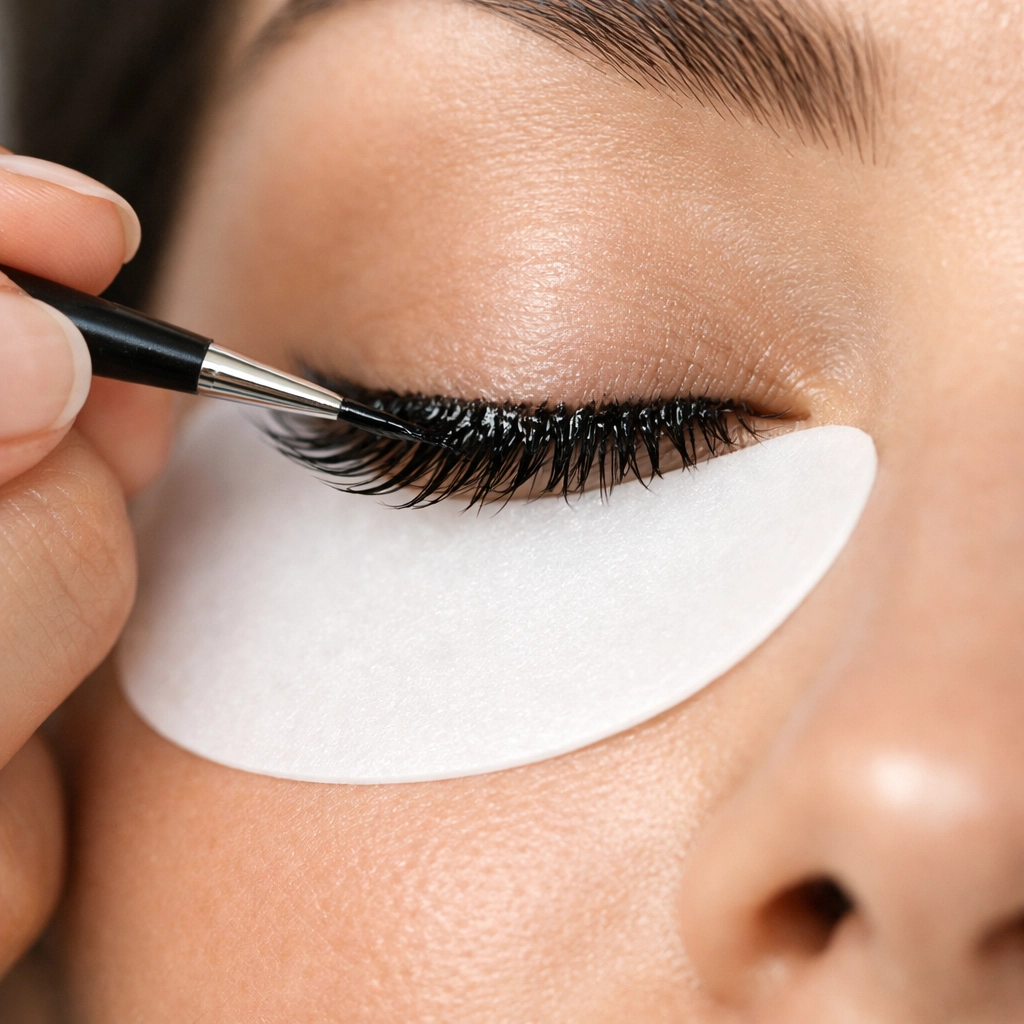
1. Apply to the Lower Lashes First
Ask the client to look up. Use a fine-tip brush or a disposable wand to coat the lower lashes from the root to the tip. Pay close attention to the tiny lashes in the corners. Starting with the lower lashes makes the rest of the process much cleaner.
2. Move to the Upper Lashes
Instruct the client to close their eyes and keep them closed throughout the process. Apply the tint to the top of the upper lashes, then work from underneath to ensure every single hair is saturated. Avoid touching the skin or the waterline.
3. Set the Timer
Processing time usually ranges between 6 to 11 minutes. If a client has particularly stubborn or thick hair, you might go up to 12 minutes. Always follow the manufacturer's specific instructions found in your eyelash tint kits.
4. Controlled Removal
Use a dry cotton round to wipe away the bulk of the tint first. Then, use a damp cotton round to clean the area thoroughly. Move in an outward motion away from the eye. Once the visible tint is gone, you can use a saline rinse to ensure no residue remains.
Why Lash Conditioner for Lash Lift is the Secret Weapon
The biggest mistake a technician can make is stopping at the removal step. Tinting and lifting are chemical processes. While safe, they can leave the hair cuticle slightly open and the lashes a bit dehydrated.
This is where a lash conditioner for lash lift comes in. Think of it like the conditioner you use after coloring your hair. It seals the cuticle, locks in the moisture, and keeps the lashes flexible.
Benefits of Using a Professional Lash Conditioner:
- Longer Lasting Color: By sealing the cuticle, the tint stays trapped inside the hair shaft longer.
- Prevents Brittleness: It keeps the natural lashes from becoming dry or prone to breaking.
- Adds Shine: Conditioned lashes have a healthy, glossy sheen that makes the tint look even better.
- Increases Client Satisfaction: When a client sees their lashes stay healthy and vibrant, they will keep coming back to you.
We recommend providing your clients with an aftercare conditioner. It is an easy upsell that provides immense value. Check out our aftercare selection to find the best options for your salon.