Recent Posts
- Should I Cleanse the Lashes Before a Lash Lift?
- How to Choose the Correct Silicone Rod or Shield Size for Each Client’s Lashes
- How a Professional Lash Lift Kit Can Boost Your Salon Revenue by $1,000/Month
- Can I Reuse Silicone Rods and Other Lash Lift Tools? A Guide for Beauty Professionals
- How to Start a Pro Lash Lift Business
10 Eyelash Extension Tips for Beginners and Professionals
Posted by Jess on Mar 23, 2022
For years, celebrities and makeup artists have relied on eyelash extensions to make their eyes look brighter, bigger, and better rested. Now, these services are available at certified salons, and anyone can use them to fake a great night's sleep and elevate their appearance.
While the benefits of lash extensions are irrefutable, they can be a little tricky to apply. Whether you're just starting out as a lash artist or you've been honing your craft for a while, today's post is for you. We're sharing 10 of our best eyelash extension tips so you can help your clients achieve that perfect look every time.
1. Use a Pre-Treatment
Before you apply the lash extensions, it's important to clean your clients' natural eyelashes with a Pre-Treatment. Also called a primer, this is a cleansing solution that removes debris and residue from the lashes, even tackling grime that isn't visible to the naked eye.
This step gives you a clean, smooth base to work with, which can help the lashes adhere better and last longer. Over time, products like facial cleansers and makeup removers can slowly degrade the adhesive, which can shorten the lifespan of the extensions. By starting with a clean surface, you can lower this risk and maximize the ROI of their lash investment.
Never rush the pre-treatment process, even for infill clients. There are several different tools you can use to apply the pre-treatment, including microfiber brushes. To speed up the process, ask your clients to come to their extension appointments without any eye makeup on.
If they can't commit to this step, then ask them to at least skip the waterproof mascara. Only oil-based removers can effectively take off all of this product, and the process is time-consuming and tedious.
2. Start With Baby Lashes
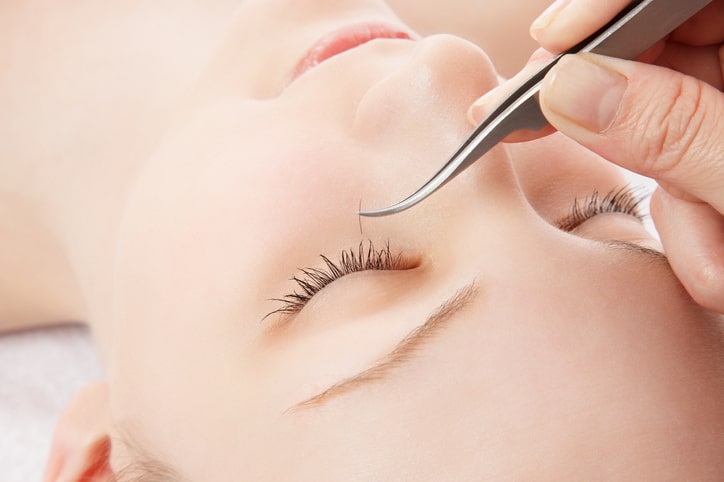
There's a reason why most lash artists only last around five years in this profession. Attaching individual lash extensions can be a tedious and time-consuming job, and it requires a ton of concentration and focus. This is especially the case when you're attaching extensions to those short, fine baby lashes.
That's why we recommend starting with those first! It can be a little more challenging to finagle each one and get the extension to securely attach, which requires more energy. By getting the hardest part out of the way first, you won't tire yourself out from the beginning.
3. Use Liquid Protein Remover
Once you've applied the pre-treatment, it's also smart to apply liquid protein powder to your clients' lashes. While the pre-treatment gets rid of artificial particles on each lash, the powder removes any natural particles that might be present, including proteins and oils.
These secretions can create a thin barrier between the lashes and extensions, which also limits their adhesiveness and overall lifespan.
4. Apply the Right Amount of Adhesive
It's critical to strike the perfect balance when applying lash adhesive. If you use too much, the extensions can become too heavy on the client's natural eyelashes, and shed faster. If you use too little, the extension won't adhere as securely or last as long.
The goal is to get a small bead of glue on each extension, rather than a thin film of it. You can achieve this by dipping and scooping the extension in the adhesive rather than swiping it. Otherwise, there's a good chance the glue could dry before you have a chance to attach it properly.
If you notice that you're getting too much adhesive, try scooping a little slower and more carefully. Scooping too quickly can make a mess and leave you with an excess amount of glue on each extension. To keep your hands in a comfortable, ergonomic position, consider using adhesive rings with cups.
These helpful accessories ensure your adhesive is always close by, which means you can pick up each extension, dip it in the glue, and place it on the lashes in a shorter amount of time. Not only does this create a more secure fit, but it also quickens the overall application process.
Expertly applied adhesive can also help you avoid those dreaded "stickies" that occur when lash extensions stick to one another. This usually happens when individual lashes aren't isolated as they should be, and you add a new extension before the previous one has fully dried.
If a stickie occurs, it's easy to remove the adhesive, clean the lash, and try again. Still, you don't want to spend all of your time on re-work. Get your adhesive right the first time, and don't forget to review your work when you're finished, using tweezers to check between layers.
5. Apply Eye Patches Strategically
Eye patches are an important part of the lash extension process. They hold down the lower lashes, help you see the upper lashes more clearly and they keep your clients more comfortable. Yet, it's easy to misuse them or put them in the wrong place.
First, don't place the patches too close to your clients' eyes and steer clear of the waterline. This can lead to irritation and even bruising, so allow for a little breathing room. It can help to start at the inner corner of their lashline, and gently press the patch outward from there.
Make sure the short lashes in the innermost corners don't get too close to the patch. Otherwise, they could inadvertently lift, which can affect your placement.
As you shop for the perfect eye patches, consider using our Eye Gel Pads instead. These crescent-shaped, lint-free pads are cool and comfortable for your patients and incredibly easy to use. They're also a cinch to remove when the application process is over.
You can find these in three different sizes, including Standard, Ultra-Thin, and Mini. Our Ultra-Thin Gel Eye Pads are teardrop-shaped and a little larger in size. They contain collagen and conform to each client's eye area.
The Mini Gel Eye Pads are crescent-shaped and a little smaller, fitting easily under each eye. If you have clients with smaller eyes, these are ideal.
6. Follow a Map
There's an artistry to eyelash extensions, and a strategic side, as well. Lash mapping allows you to tap into both. You need to know where you're going to place each individual extension to make sure the final look is one your clients love.
Whether you're doing a single layer of extensions or working with multiple layers, a map is essential for achieving balance and symmetry. With layers, it helps you determine how long the lash length should be in each location, so everything flows together beautifully. By following a map, you can make sure you're placing the longer extensions on the bottom layer and the shorter ones on top, delivering that coveted natural look.
Lash mapping starts with finding the center of each eye, or the iris. You can't see this if your clients have their eyes closed, so make mapping one of the first steps you perform. Ask them to keep their eyes open as you locate and mark this starting point with a brow pencil or eyeliner.
Following the map, take care not to place the extensions too close to the eyelid, or too far away from it. If they're too close, they can be painful and irritating. If they're too far, the natural lash could grow too fast and throw off your symmetry, which could also damage the eyelid.
7. Don't Hyperfocus on Perfection
As a lash artist, you know that each lash will need its own individual extension. Yet, don't spend too long trying to isolate the "perfect" natural lash for each one. This can heap a ton of time onto the application, which will frustrate both you and your client.
You need to maintain your concentration the entire time, and devote all of your mental energy to the task. If you spend a few minutes per lash, you'll be exhausted by the time you finish half an eye!
That said, you will need to spend some time choosing the right style of lashes before you begin. There isn't a universal approach that works for everyone, which is why client consultations are so important. You need to make sure that you're using extensions that are the correct length, thickness, and curl style for each person you work with.
There are a few factors that will influence this decision, including:
- The direction of the client's natural lash growth
- The client's facial structure
- The shapes of the client's eyes
- The distance between the client's eyes
Talk to each client to get an idea of what they expect. Then, consider how feasible that request is, and what it will require to achieve it.
For instance, if they want the "cat eye" look, do they have the right eye shape for it? If not, recommend a different look that will complement their facial features and deliver a similar appearance. Most of the time, this will mean combining different styles of lashes to create a custom, one-of-a-kind style.
8. Secure Extension Strips With Lash Tiles
As you work, you need to be able to quickly pick up each extension without any fuss or hassle. If your lash extension strips are simply sitting on a surface beside you, they could move around on the table, fall to the ground, or slip out of your reach.
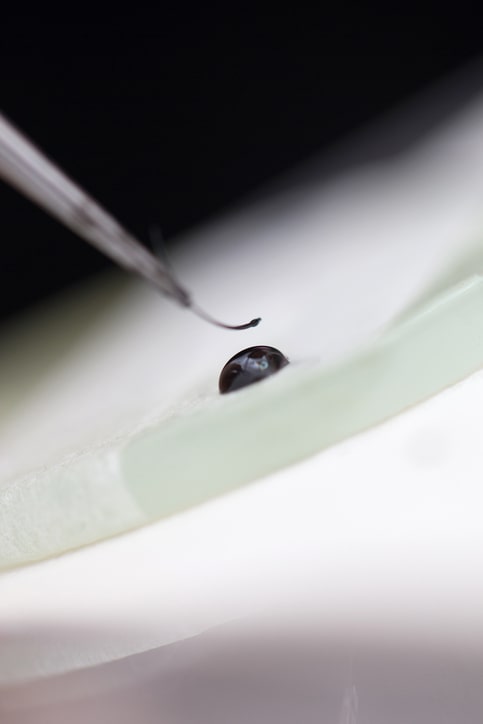
Our Eyelash Extension Glass Lash Tiles solve this problem. Not only do they give you a clean, secure surface on which to store your extension strips, but they also keep them firmly in place throughout the application.
These tiles are heavy and sturdy, with the capacity to hold up to 12 strips of extensions. Ideal for both classic lashes and high-volume looks, they also include a non-porous spot to hold your lash adhesive.
9. Get the Lash Direction Right
Remind them that the goal is to achieve gorgeous, yet believable lashes that look as realistic as possible.
For this reason, encourage them away from ultra-thick lashes or fully fanned ones that will damage their natural lash. While these can be great for special occasions, they're not recommended for long-term use and should be removed as soon as possible.
Instead, focus on making sure the lashes are pointing in the right direction. The inner corners and outer corners should fan out just slightly, and the remaining lashes should follow in that gentle arc. It can help to think of the lash line as a sunrise, with beams shining softly out of it.
While your clients have their eyes closed, use a small handheld mirror to make sure you're applying the lash extensions in the right direction. Place the mirror under their lashes to check that the tips are neat and in the proper position for the style you're working on.
10. Finish With a Sealer
The lash extensions are applied and the result is beautiful. Before sending your clients home, finish up the appointment by applying a thin coat of sealer.
This thin, clear solution adheres to the base of the lashes and goes on effortlessly with a micro swab. When applied correctly, it can help keep debris and grime out of the extensions for at least one week after application.
Simply pour a small amount of the sealer into your Lash Tile or ring cup and apply it from there. This is an extra step that can make a world of difference, turning one-time clients into loyal, repeat customers.
Follow These Eyelash Extension Tips For the Perfect Application
Lash artists know that this career can be a rewarding yet challenging one. You can help your clients feel more confident and beautiful, but it's important to know what you're doing!
Over time, the application process will become less daunting and more intuitive. You'll learn how to place the extensions the right way, avoid common errors, and course-correct if any issues occur. Along the way, keep these eyelash extension tips handy and refer to them often!
We provide a range of products designed to help you excel. Feel free to check out our full collection of eyelash extension supplies today!


